


Solving Surface Scratches in Injection Molding: Comprehensive Control from Mold and Process to Operation

The surface finish, mirror effect, and overall appearance integrity of injection molded plastic parts are a direct reflection of a brand's
product quality and market competitiveness. Surface scratches are a highly prevalent, easily overlooked, yet extremely impactful appearance defect in injection molding production. These include various types such as hairline scratches, hard scratches, demolding tears, mold marks, and friction scratches.
Surface scratches directly disrupt subsequent surface decoration processes such as pad printing, screen printing, spray painting, electroplating, and laser engraving: ink easily accumulates in the scratch grooves, resulting in broken lines, color differences, unevenness, poor adhesion, and peeling; scratches remain noticeable even after spray painting, requiring rework and polishing, which is time-consuming and material-intensive, and in severe cases, the entire batch can be scrapped, causing significant cost losses and delivery delays.
- Main Causes of Scratches on Injection Molded Surfaces
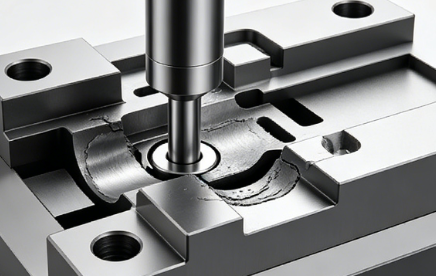
Scratches originate from the entire chain, including mold, process, demolding mechanism, product structure, manual operation, and storage environment:
1. Mold Body Causes: Insufficient polishing of the cavity and core leaves tool marks and sand marks; insufficient hardness of the mold steel leads to burrs and wear over long-term production; excessive clearance in ejector pins, sleeves, inserts, and slides results in rough surfaces and misalignment; sharp corner burrs on the parting surface and carbon buildup and corrosion in the mold cavity can all transfer or scratch the product surface.
2. Injection Molding Process Causes: Injection speed too fast causes high-speed melt to scour the mold wall, forming flow marks and scratches; insufficient cooling time results in premature demolding before the product has set; excessive cooling causes the product to cling to the mold core, increasing demolding resistance and causing scratches; imbalance between mold and material temperatures leads to deformation, friction, and scratches.
3. Product Structure and Demolding Causes: Insufficient draft angle, thin ribs, excessive undercuts, and lack of proper rounded corners significantly increase demolding resistance, resulting in hard friction during ejection and producing strip-like scratches. 4. Human and Environmental Factors: Dust, adhesive residue, and metal shavings falling into the mold cavity cause scratches; employees using sharp tools to pry products; semi-finished products lacking protective films and rubbing against each other when stacked; lack of anti-collision barriers during handling and storage, resulting in secondary scratches.
- Comprehensive Prevention and Solutions for Injection Molding Surface Scratches
1. Mold Source Control: Use high-hardness, wear-resistant mold steel; perform mirror-finish nano-polishing of the cavity and core to remove tool marks and sanding marks; perform regular mold maintenance, rust and carbon removal, and hard chrome plating to improve wear resistance; optimize the fit precision of ejector pins and slides, chamfering and removing sharp corners to ensure smooth movement without scratches.
2. Injection Molding Process Parameter Optimization: Segmented speed injection to avoid high-speed erosion of the mold wall; match reasonable mold temperature, material temperature, and cooling time to ensure uniform product shaping; uniform and slow ejection to reduce demolding friction and scratches.
3. Pre-design Product Structure Optimization:** Increase draft angles and rounded corners during the design phase; avoid deep ribs, right-angle undercuts, and other easily damaged structures; use sliding core-pulling for complex structures to reduce forced demolding.
4. Standardized Workshop Operations:** Maintain a dust-free workshop and regularly clean mold cavity debris; prohibit the use of sharp tools for demolding, and uniformly use soft plastic tools; wrap semi-finished products individually with paper dividers for layered turnover, and add soft padding to turnover boxes to prevent friction and impact.
5. Graded Scratch Repair Solution:** Minor hairline scratches: fine polishing with fine sandpaper, oilstone, and diamond paste; moderate scratches: texturing, sanding, and spray painting for coverage; deep structural scratches: mold repair and machine adjustment are necessary to prevent batch recurrence from the root cause.
III. High-Quality Plastic Parts Guarantee for Pad Printing and Screen Printing:** Plastic shells, buttons, and panels requiring pad printing and screen printing must have a zero-scratch, highly flat base surface to ensure clear printing patterns, ink adhesion, and uniform color.
AAA MOULD integrates mold design, precision injection molding, defect rectification, pad printing, and screen printing surface decoration. It strictly controls surface quality throughout the entire chain from mold polishing, structural design, injection molding process, and production operation, avoiding molding defects such as scratches and weld lines in advance, and providing a perfect base for subsequent surface printing processes, helping customers produce high-quality, durable, and cost-effective plastic products.
